
Search
Search
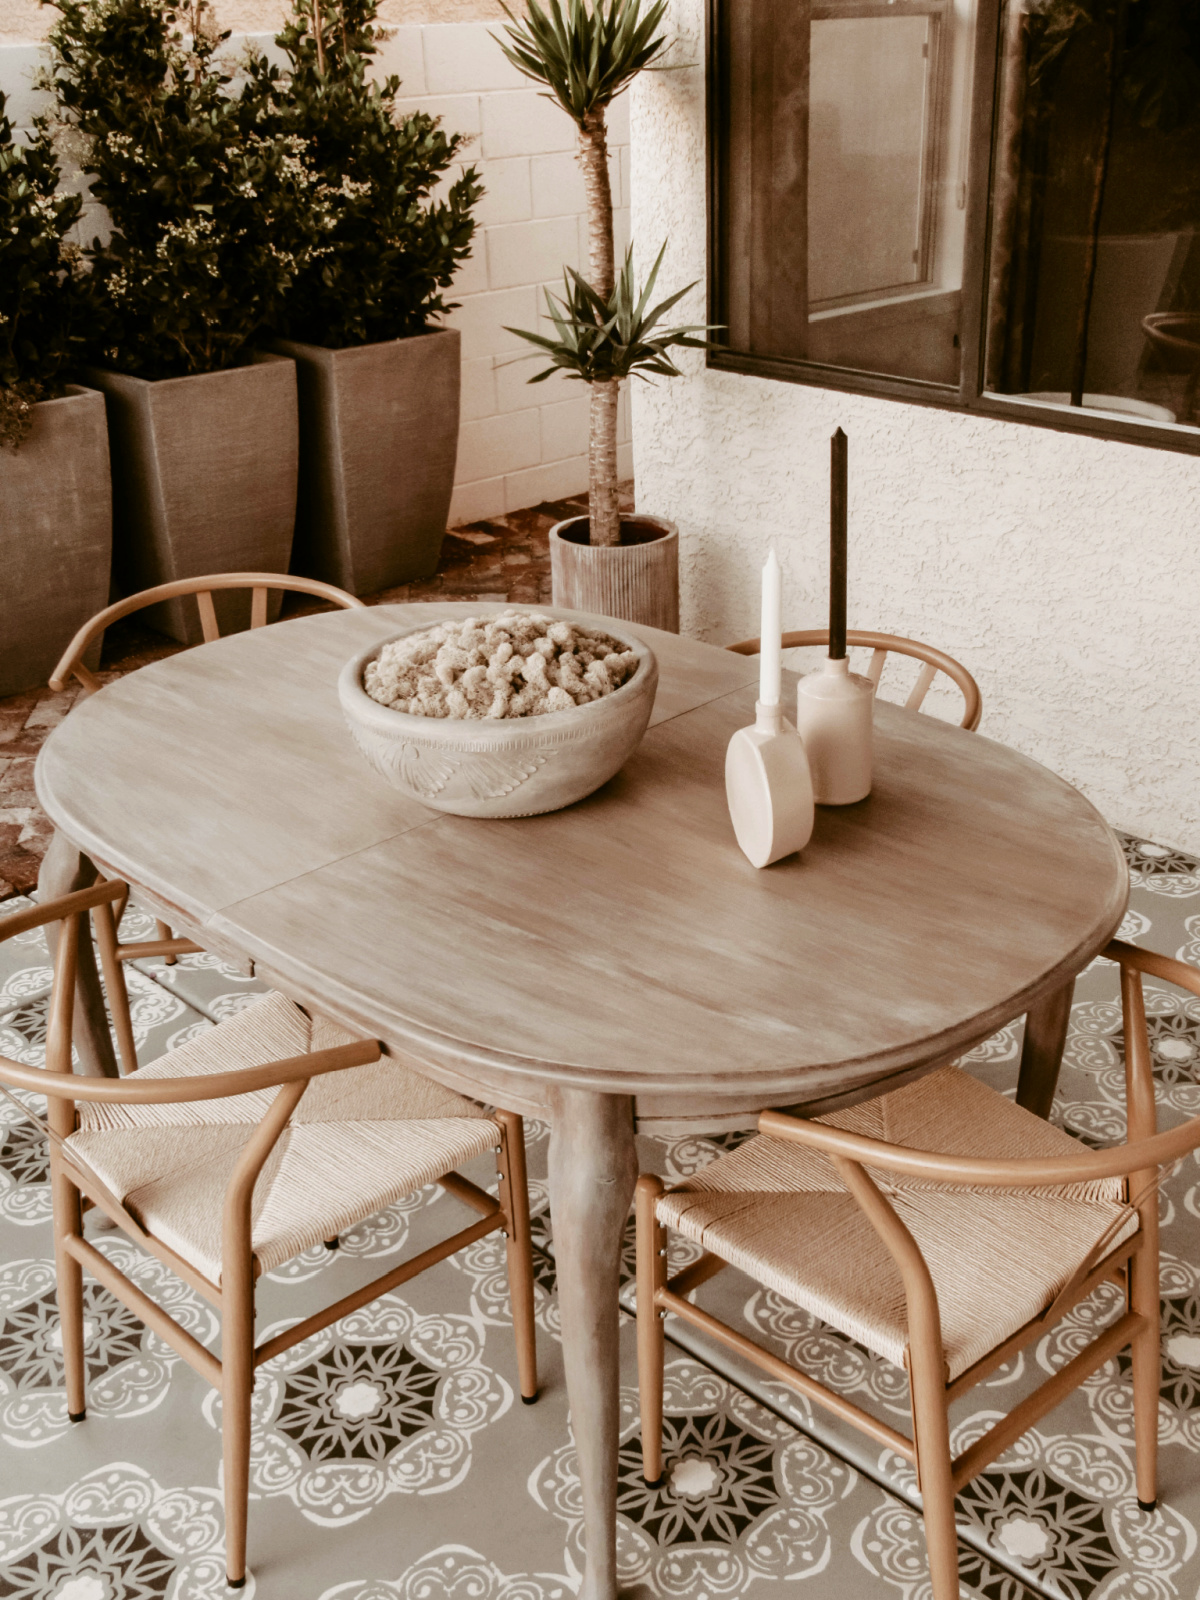
While our backyard isn’t completely ready for its full reveal just yet, (between the scope of the project and delayed delivery of a couple of the major pieces to finish it, it’s taking longer than I wanted, but it will be an amazing reveal at the end!) However, I wanted to finally reveal how the table I was refinishing (shared on Instagram stories) for the backyard dining area turned out.
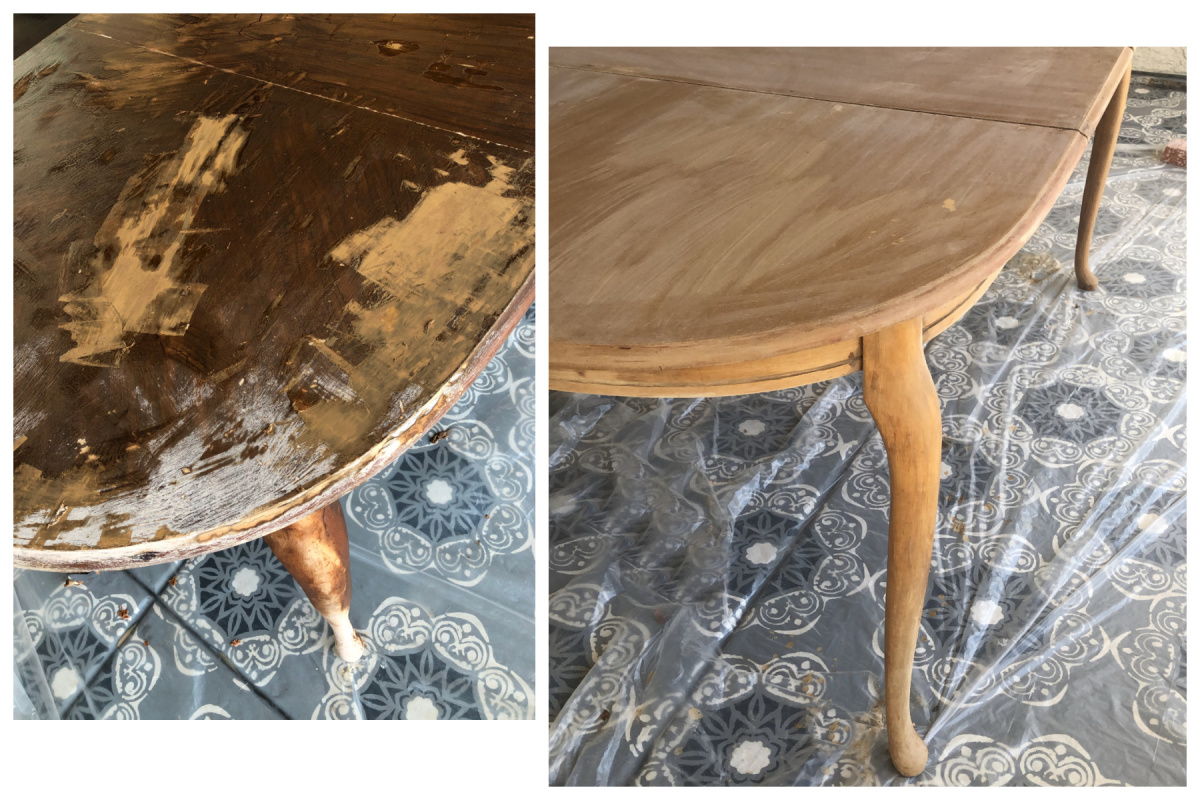
Despite the fact that I swore sixteen years ago, after many years of stripping and refinishing furniture that I would never strip another piece of furniture in my life again, at the end of March, what did I find staring right at me on Facebook market while browsing? This lovely old “vintage” dining table with these attractive legs at a whopping price of $25 begging for a makeover! It’s a deal that in a quick moment of irrational thinking made me forget about all of the past pain of refinishing furniture and pick up another stripping liquid bottle again. My thought process was ‘well, stripping this table will be a breeze since it has no intricate details to make it an arduous project – thinking it should take me a week tops in between life and work to get it done.’ My plan was to keep the whole job pretty simple by bleaching the wood after I stripped it bare, throw on a wax finish at the end, and voila! I’d have the perfect dining table for the backyard…so I thought!
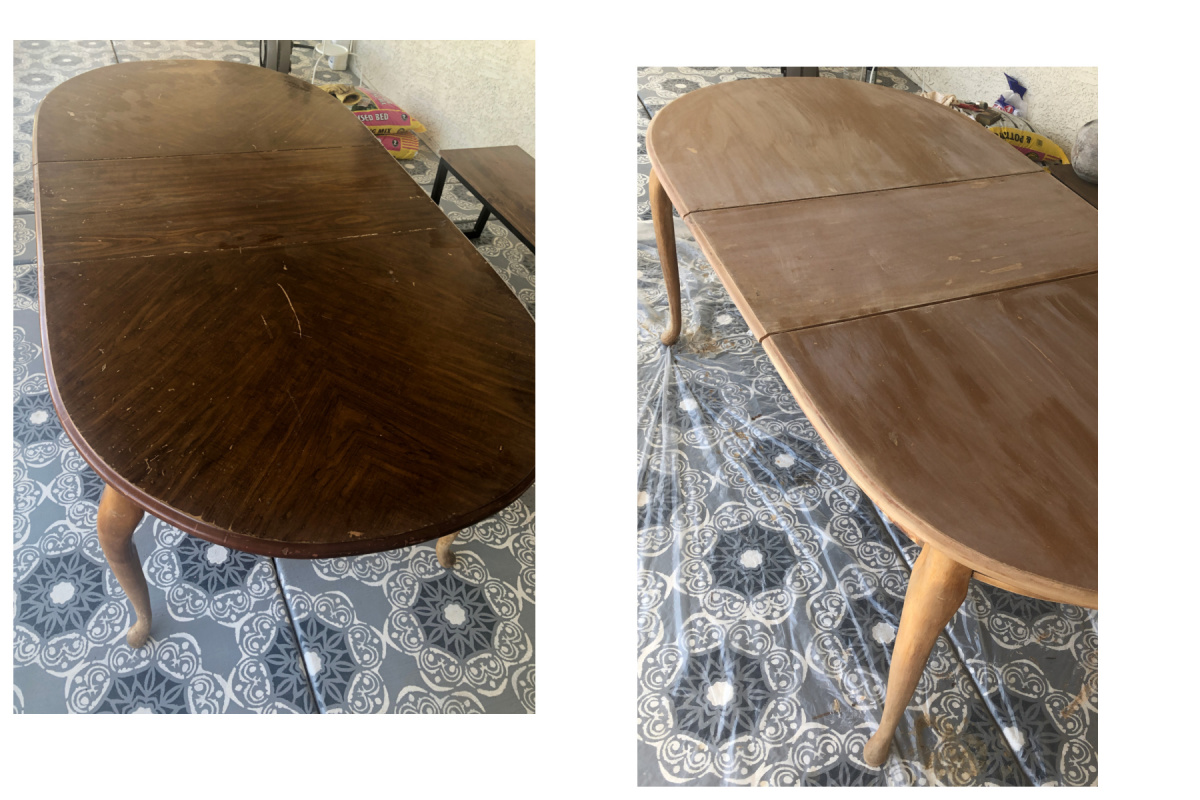
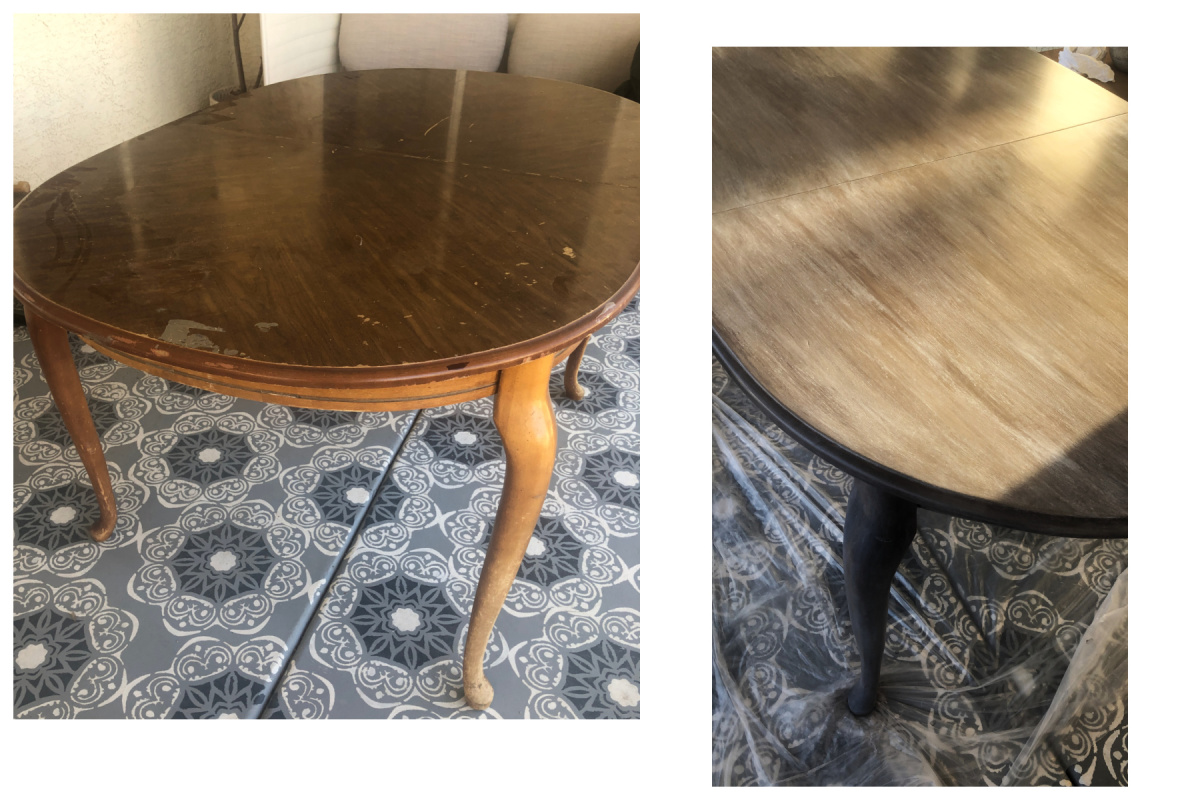
If only life was ever that easy for me. As I stripped off a section of the top of the table, to my chagrin, I realized that the top of the table is MDF! I did the wood check when we picked up the table from this older couple. The husband quickly said, “it’s solid wood.” Not only could I tell the legs were solid wood, but the table weighs a ton which made me think the whole thing was solid wood. Au contraire my friend, only the sides and legs of this table are solid wood. Suffice to say, I was not only disappointed, but this refinishing project now presented me with a myriad of challenges and took me way longer than expected and wanted to spend on it. I had to ditch my bleached wood finish idea and switch gears to a faux weathered gray driftwood look instead.
Here’s how I managed to give this Facebook Market dining table a makeover – taking it from drab to fab in a faux weathered driftwood finish:
1. The first step was stripping off the old finish on the table using this stripping gel. This process was the hardest part as this gel dries up quickly unless you wrap your piece tightly with plastic afterward to keep it from airing out. What’s nice though, you can always apply the stripping gel, wrap it and leave it overnight. The next day it makes scraping off the varnish in one fell swoop a breeze.
2. After I scraped off all the stain and varnish down to the bare wood, I used a paint stripper after wash to remove all residue. After the table dried, I used my sander with medium-grit sandpaper to smooth it out and hoped it would roughen the MDF a bit, but nope. It made it even smoother, like a baby’s bottom.
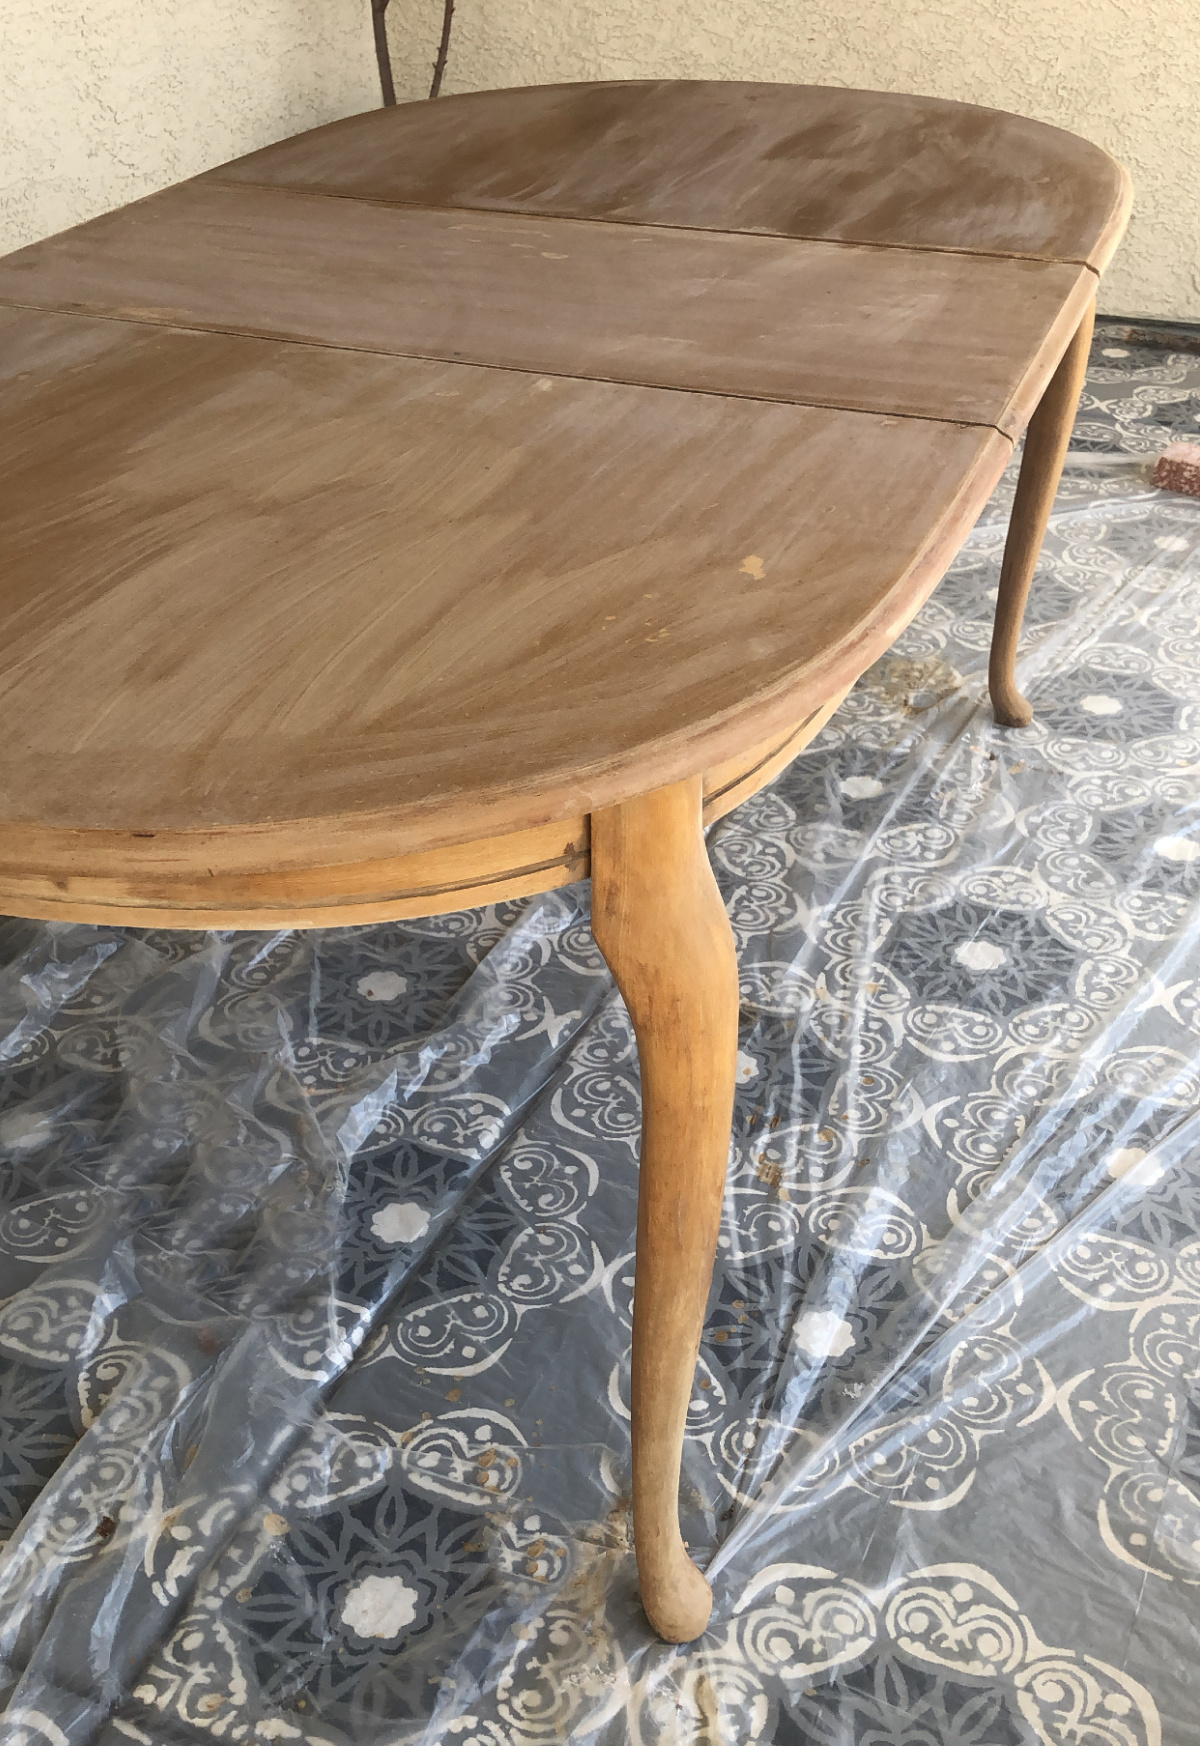
3. After sanding the table down I did a bleach wash, which looked beautiful on the legs and sides of the table which are all real wood, but it did not work on the MDF top. Imagine my despondency when I couldn’t be done with this project at this point. This caused me to lose my motivation. So the table sat out on my back patio for a couple more weeks while I turned my attention to other projects I had to finish before I could muster up more energy to figure out plan B as far as another finishing option was concerned.
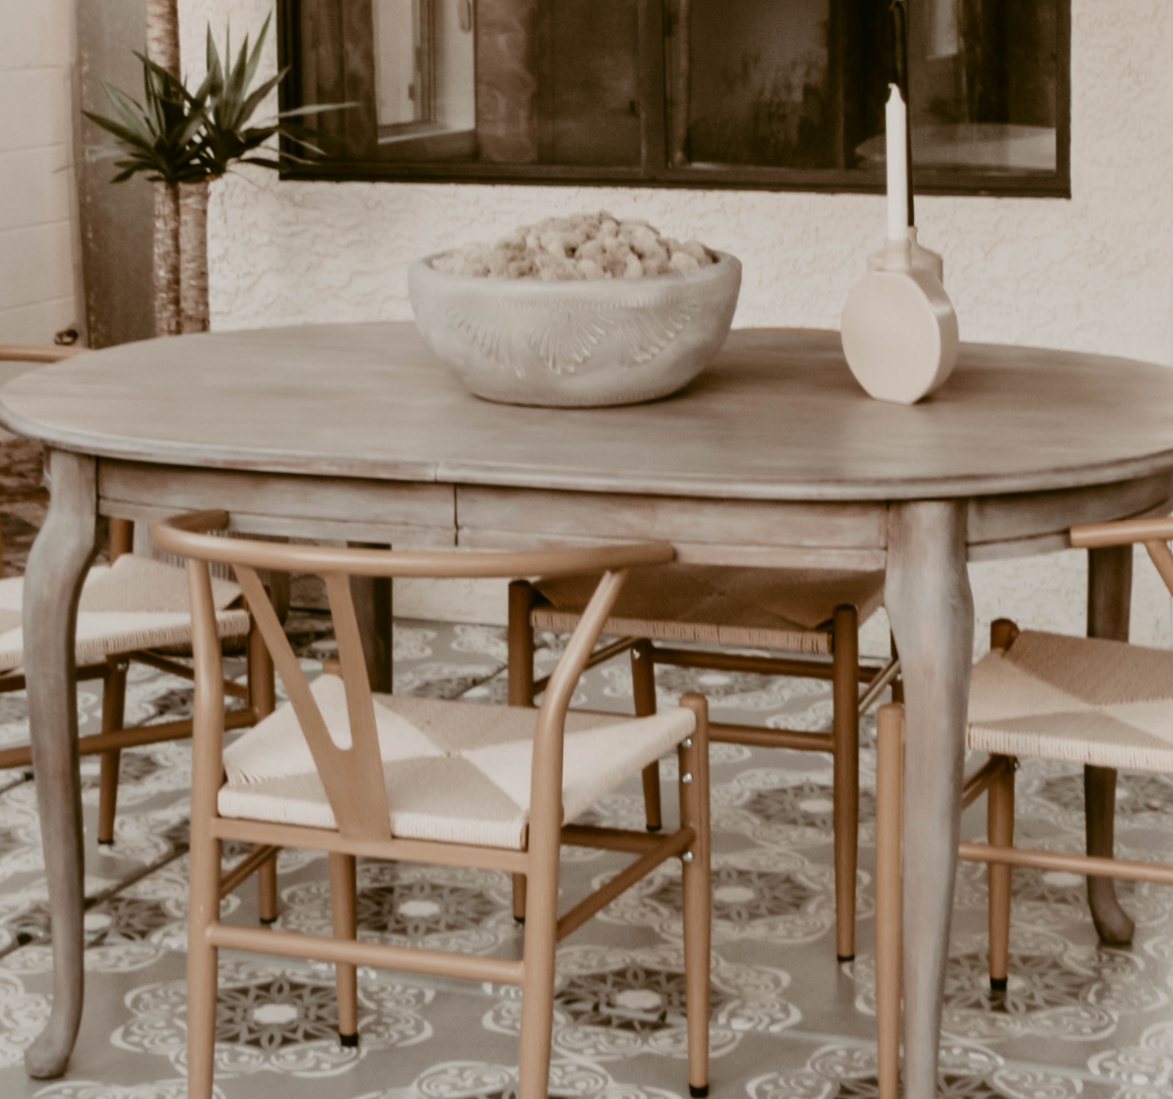
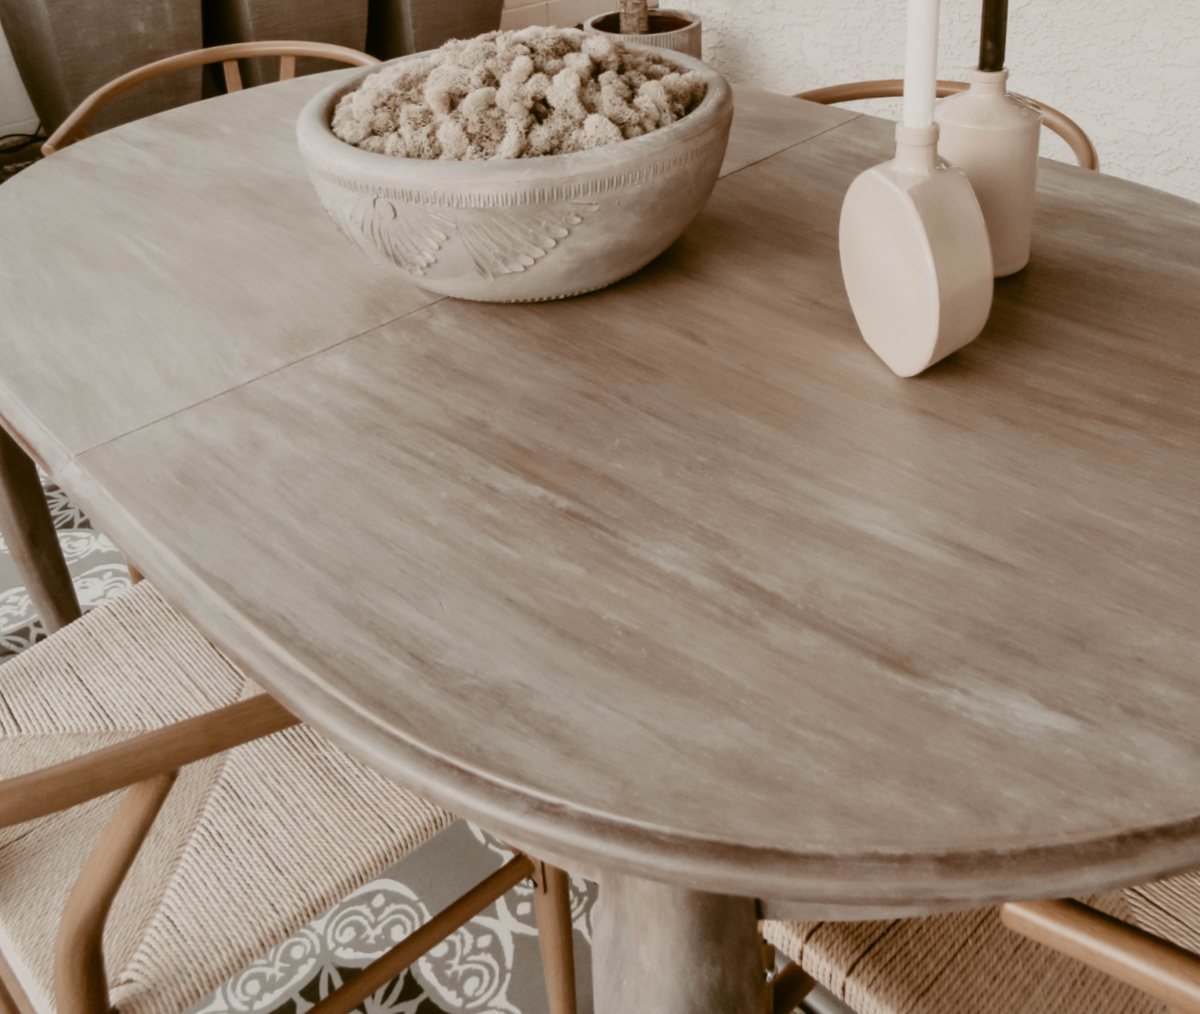
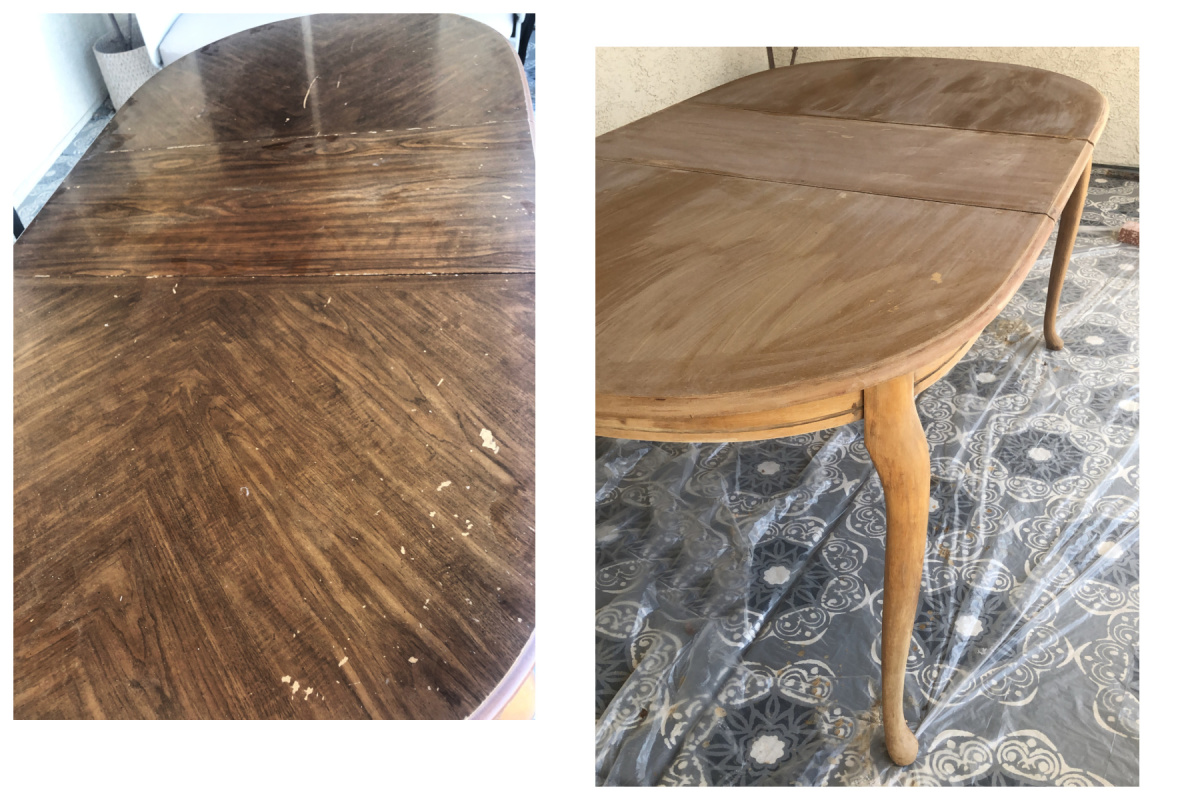
4. Finally I decided to go with a weathered driftwood gray finish using this weather wash wood stain that naturally ages wood in minutes! And since the top of the table isn’t real wood, but rather MDF, I had to figure out a way to stain the top in the same color to look like real wood, so it would match well with the rest of the table. After endless research and a ton of trial and error, a few tears even, I came up with a solution that turned out quite good.
5. MDF is an engineered wood product made of wood fibers that have been broken down into residuals, then mixed with wax and resins, and heat pressed into a dense and strong material. Hence there’s no natural wood grain nor can it absorb the stain. So, I had to give the top a light coat of paint first to help me create this faux wood grain using a couple of techniques. Thankfully, I had one quart of an old “oops” can of paint in a creamy color with a slightly yellowish undertone which was crucial to give that wood undertone effect. I used that paint color as a primer with a bristle brush in long brushstrokes all in one direction, the length of the tabletop to essentially achieve the illusion of the wood grain look. I let that dry for an hour plus.
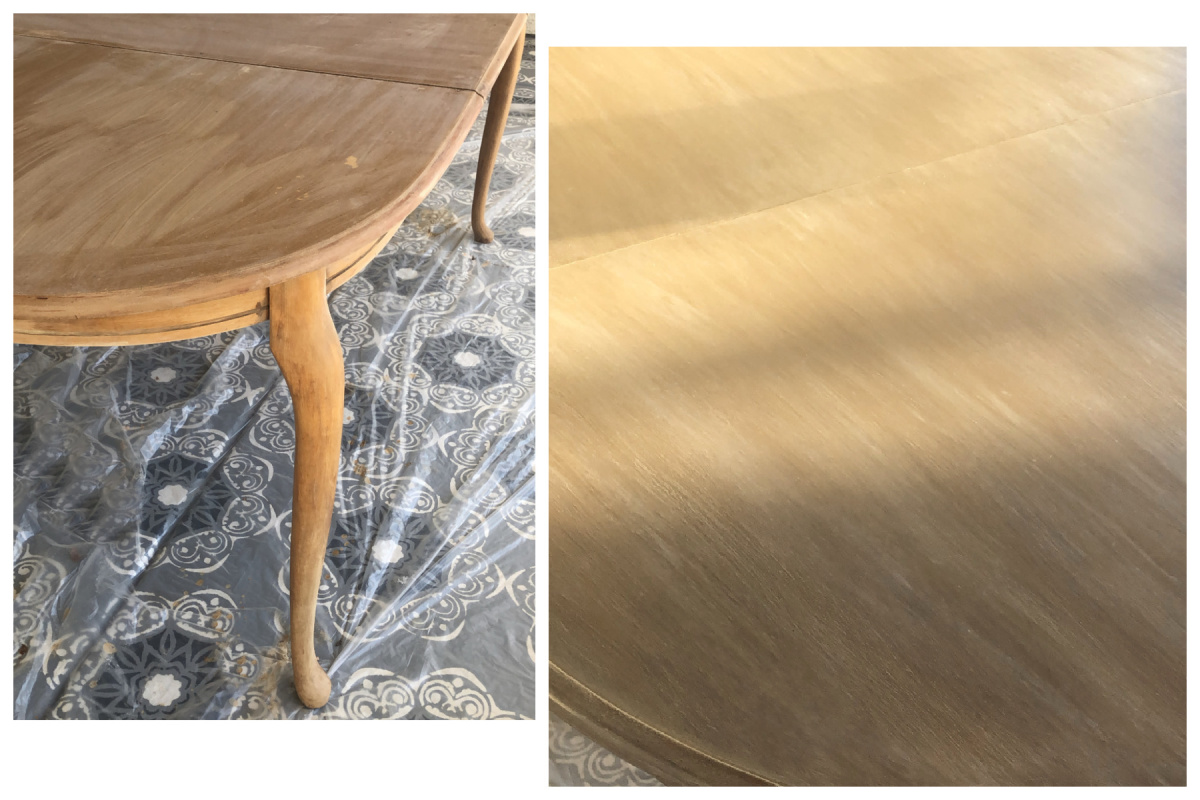
6. Then, using a rag I applied the weatherwash wood stain over my base coat going in the same direction of my faux wood grain ever so gingerly with a smooth hand movement so as not to wipe off my paint beneath. I waited an hour to an hour plus, even overnight for the stain to dry in between each coat before applying my next coat of stain. With each stain application, I made sure to go over the same stroke to remove a bit of the stain while blending with each other – revealing some of the yellowish paint underneath. I applied as many coats of the stain as needed and kept blending until I was satisfied with the color.
7. After letting all the stain coats completely dry, I then finished the whole piece from top to bottom with Minwax grain highlighting finishing wax to protect and whiten the piece and achieve the weathered driftwood look I was after. Of course, it might not look perfect, but real wood isn’t perfect either. Plus, I was going for that old vintage look.
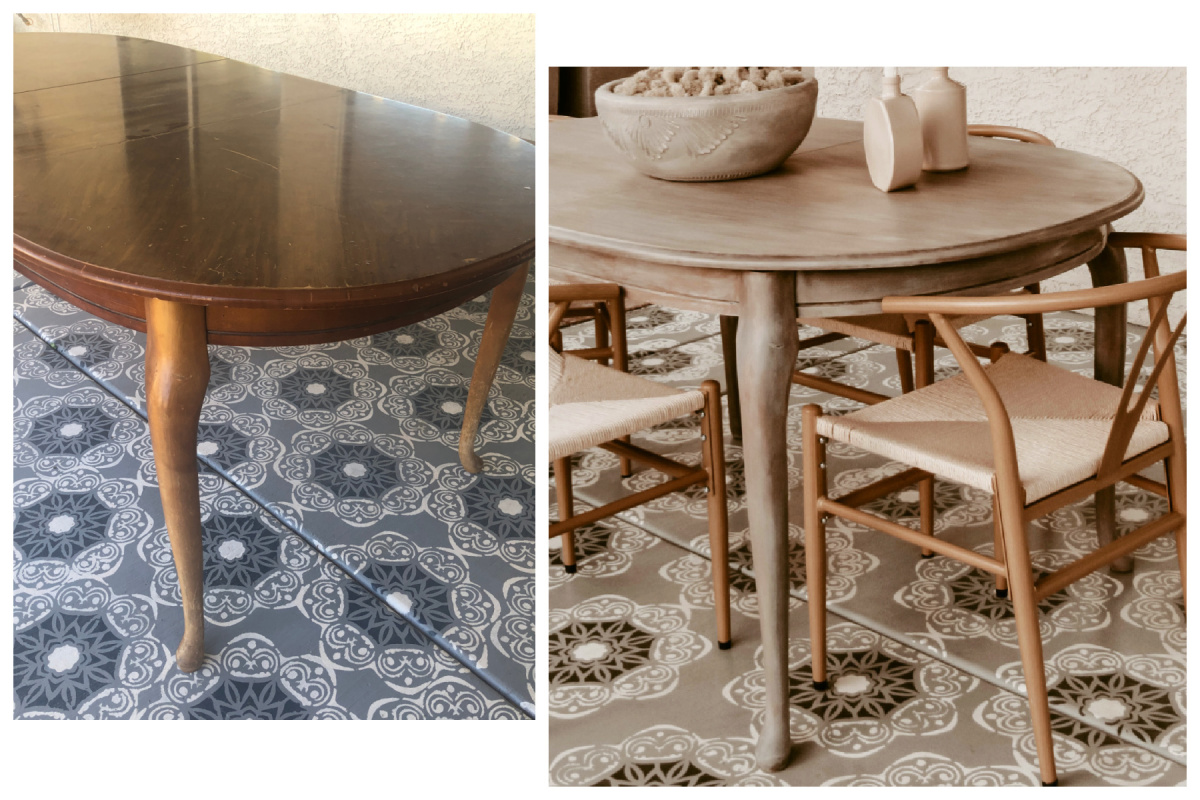
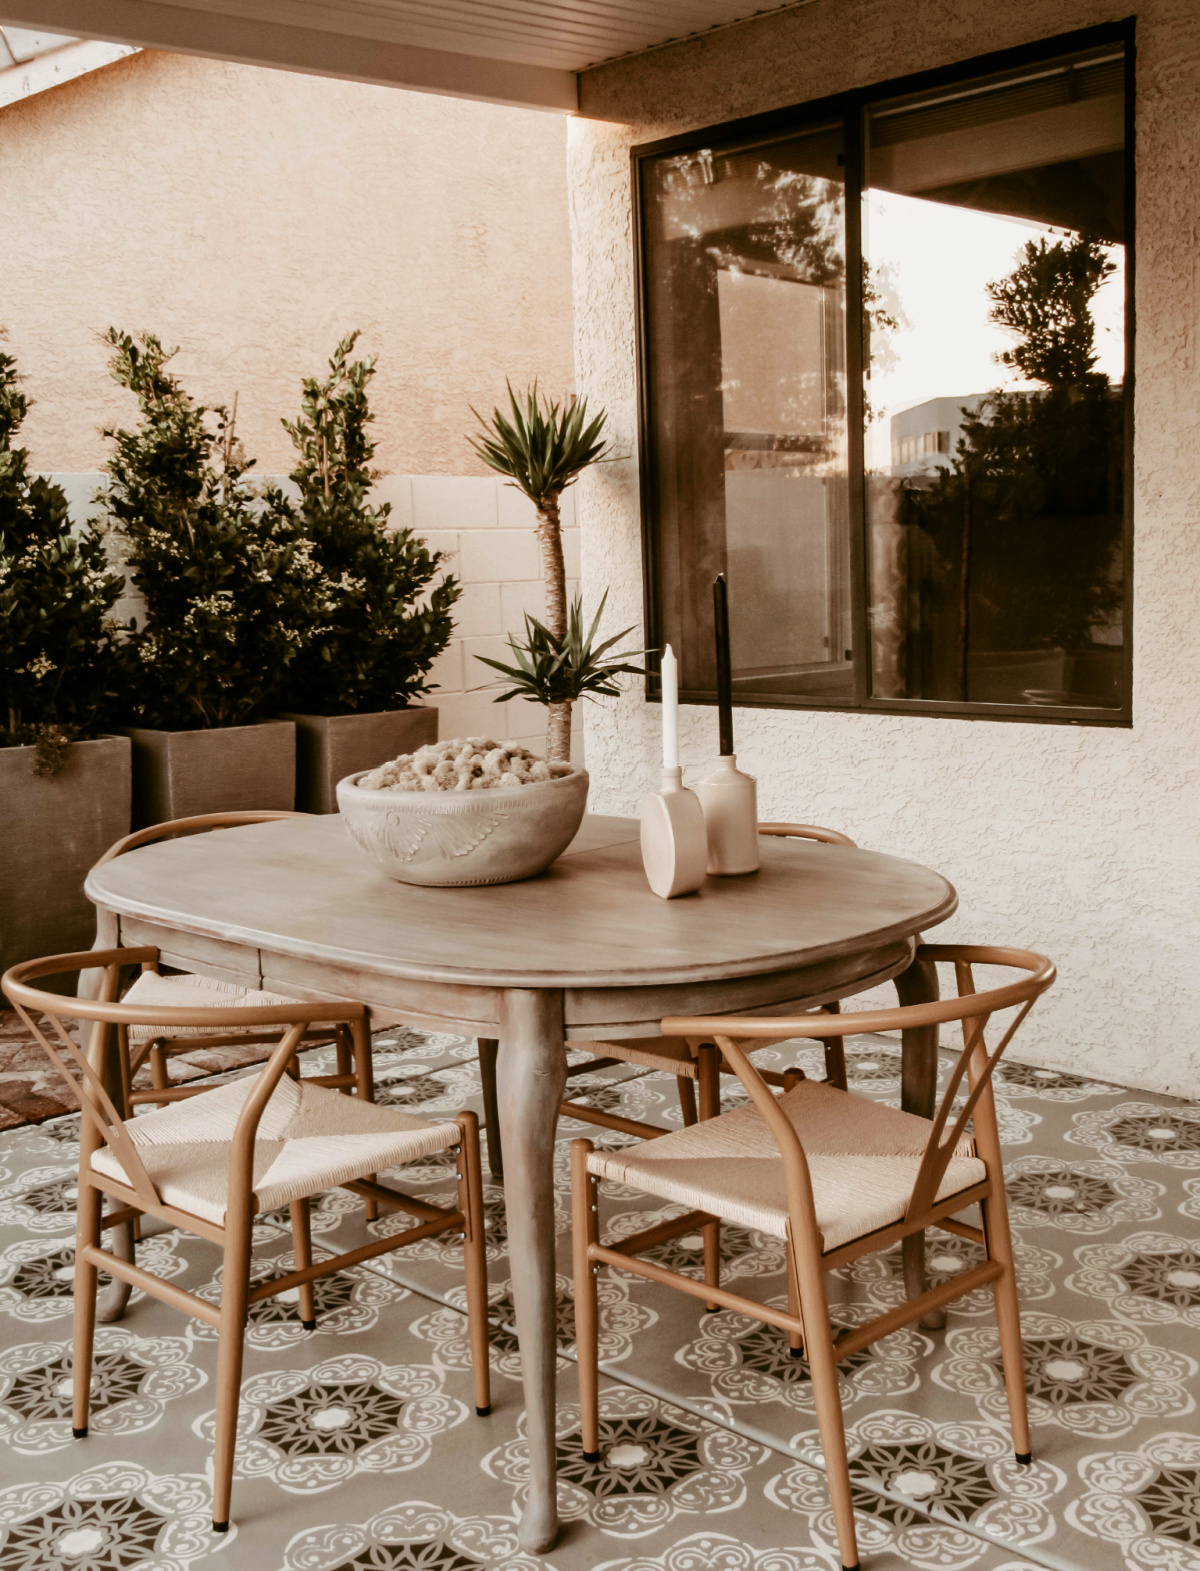
Even several days after applying the finishing wax, it still felt tacky to the touch. But after a few more days sitting outside in the open air, the top eventually dried up and I’m so happy with the final result. In the end, this drab to fab dining table makeover in faux weathered driftwood finish cost me roughly $105.00, including the table!
It has been a few months since I have completed this project and it’s perfect for the space! The only thing we still are waiting on to finish that section of the yard is the pendant light that’s going to hang over the table, but basically, the dining area of our backyard makeover is pretty much done!
*Note: Now, while a gel stain is ideal for MDF because it’s a type of stain that sits and dries on a surface, just like paint, in this particular project, however, I found it to be a sticky mess to apply over my base paint because it would dry faster than you can wipe/brush it smoothly onto the surface – leaving these awful patches that made the job twice as difficult. Hence, the reason why I went with the wood stain here. I found it to be much easier to apply as long as you allow it to dry completely in between coats.