Search
Search
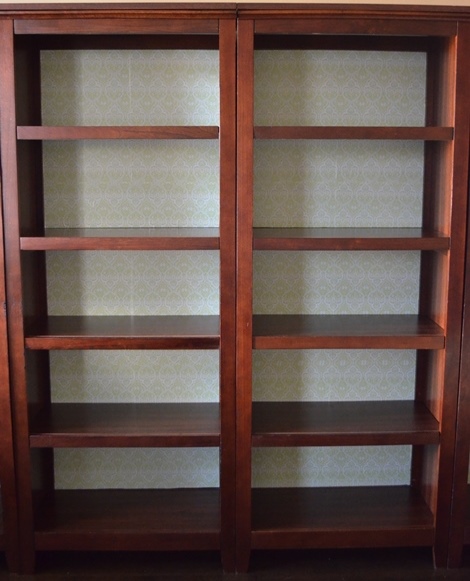
Personally, no home office/library is complete without a wall of bookshelves. No matter how big or small our rooms we’ve designated for our home office, I always start with the bookshelves first. Shelves are not only great for storage, but they add character all their own in a room, setting the tone for the space. A couple of weeks ago, I ran into the dilemma of wanting to change my four dark mahogany bookshelves that we’ve possessed more than nine years now. As with anything else, as you grow your taste grows with you, so I found myself itching to get newer bookshelves for the office, preferably in white so that all our items and books could stand out much better than the brown where I feel like everything just gets lost and blends in too much.
Then the frugal side of me kicked in thinking that I can use my money for something that is more necessary for the office, like proper office chairs. After all, aside from knicks and dings from moving, there’s absolutely nothing wrong with the shelves – but what can be done to give them a little facelift? I thought of painting them, but quickly dismissed the notion as I’m already inundated with so many half-done/unfinished projects (not to mention the wood or I should say, the non-wood material of the bookshelves would make painting them an arduous undertaking). At first, I was going to wallpaper the backs of them. However, knowing that I might eventually want to change the color down the line, I opted for contact paper in a light green paisley pattern with white and blue piping instead, which is obviously a lot more cost efficient than wallpaper would be and can be peeled off very easily when ready to try out a different pattern in a different style and color.
Here’s how I did it (with the help of my kind hubby;):
Step 1:
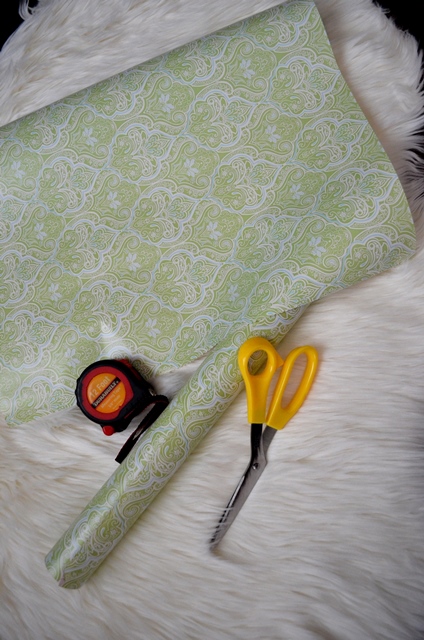
Take out all removable shelves. Measure the width and height of the bookcase. If there are permanent shelves, make sure to measure each section of the back individually. At first I started using my first cut piece as a template thinking it’d make the process quicker, but quickly realized that each section was invariably different. So make sure to measure twice so you can cut once.
Step 2:

Cut wallpaper and/or contact paper (whichever one you choose) to the exact size you’ll need to cover the back of the bookshelf. And before peeling the back of the contact paper make sure to lay the wallpaper and/or contact paper pieces against the back to ensure they fit perfectly. It’s better to have a little extra trim to play with than not enough, cause you can always use an xacto or blade to trim any excess if necessary.
Step 3:
Take the wallpaper and/or contact paper match the two upper corners to the upper corners of the bookshelf back pressing lightly and slowly so as to avoid bubbles.
Step 4:

Using a squeegee or a straight flat edge, smooth the wallpaper and/or contact paper down starting in the center working your way out toward the edges to eliminate any creases and pesky air bubbles. If there’s stubborn bubbles – use a small pin to pop it, then smooth down.
Step 5:

Once completed, return the shelves in their places. Then give the shelves personality by decorating them. I’m in that process now – will share the after when it’s all done.